Month: April 2013

Easy Barbecue Sauce

IMG_7239

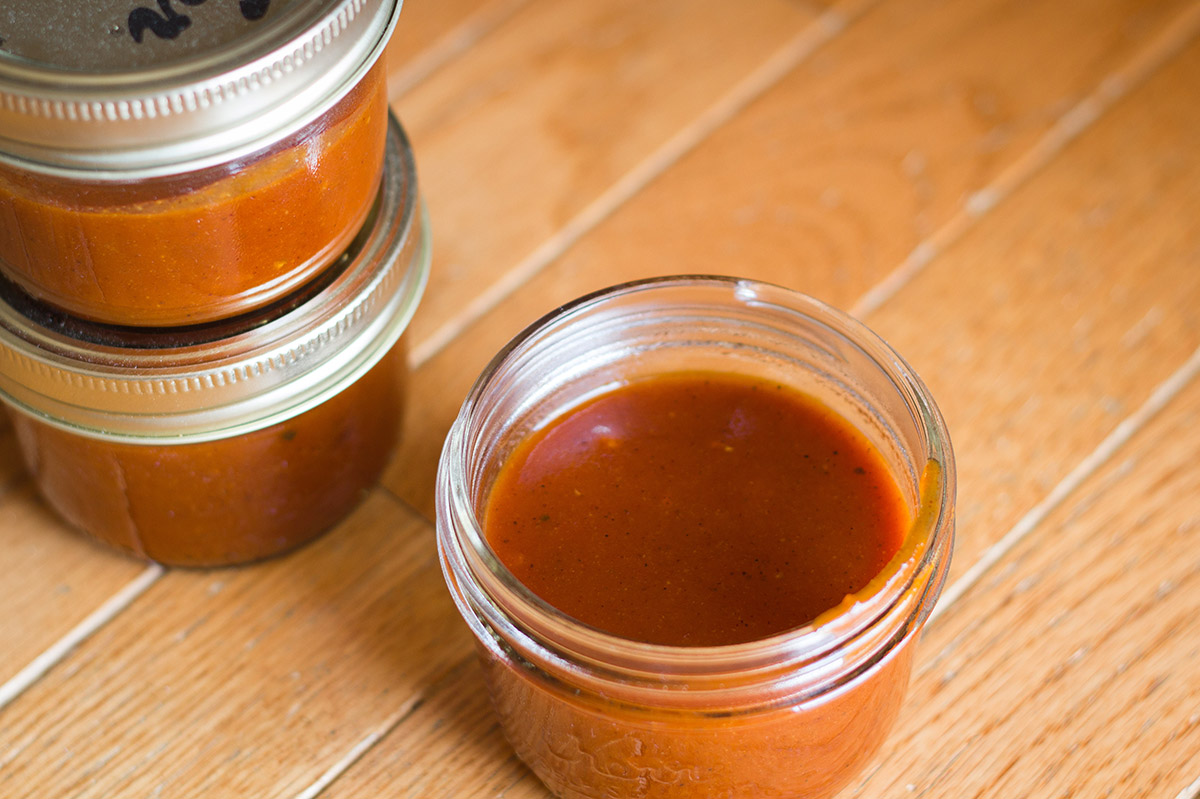
Now that it has finally started to be nice outside, we’ve been grilling for dinner almost every night. In an effort to stop using processed foods, I went about trying to make my own barbecue sauce. Little did I know that to make it from scratch, I needed to let it simmer for a couple hours to allow the tomatoes to break down. That’s when I came across a quick and easy barbecue sauce in a Cook’s Illustrated cookbook. While it may not be completely unprocessed, it is at least a little better than buying a bottle of BBQ sauce from the store.

Easy Barbecue Sauce (makes about 1 1/2 cups)

  • 1 medium onion, peeled and quartered
  • 1/4 cup water
  • 1 cup ketchup
  • 5 tablespoons molasses
  • 2 tablespoons apple cider vinegar
  • 2 tablespoons Worcestershire sauce
  • 2 tablespoons Dijon mustard
  • 1 1/2 teaspoons liquid smoke
  • 1/4 teaspoon ground black pepper
  • 2 tablespoons vegetable oil
  • 1 medium garlic clove, minced
  • 1 teaspoon chili powder
  • 1/4 teaspoon cayenne pepper

Directions

  1. Process the onion with the water in a food processor until pureed and the mixture looks like slush. Strain mixture through a mesh strainer and press the solid with a rubber spatula until you have about 1/2 cups of juice. Discard the solids.
  2. Whisk the onion juice, ketchup, molasses, apple cider vinegar, Worcestershire, mustard, liquid smoke, and black pepper in a bowl.
  3. Heat the oil in a large saucepan over medium heat. Add the garlic, chili powder, and cayenne pepper. Cook for about 30 seconds, or until fragrant. Whisk in the ketchup mixture and bring to a boil. Reduce heat to medium-low and simmer gently, uncovered, for about 25 minutes. Cool the sauce to room temperature before using. (It can be refrigerated in an airtight container for up to 1 week.)

Garden Progress – Spring 2013

IMG_7291

We have seedlings!

This past weekend, our garden has erupted with cucumbers, green beans and summer squash seedlings. Liam has really enjoyed learning what all the different plants are and pointing each of them out to us.


Vegetable Garden – Spring 2013

IMG_7201

As I said in my previos post, we started our vegetable garden this past weekend. We started growing our own garden in the spring of 2009. Then, Liam was born in 2011 and we let it go for two years. Now that Liam can walk and play outside, we felt it was time to get started again.

After two years of neglect, our square foot gardens were not looking too good. Each box had about 2 dozen weeds and a couple of trees growing in them. Over the course of a couple hours on a nice spring afternoon we were able to clear everything out and get ready for planting.

We decided not to grow a whole lot this year. Stephen and I thought it would be best to keep it simple and only grow vegetables that we knew we would use. We settled on planting Roma tomatoes (which I plan to make my own pasta sauce with), green/red bell peppers, cucumbers, green beans, zucchini, and pumpkins.

IMG_7211

I know it doesn’t look like much right now, but in a few weeks the seeds will be sprouting. We may even have a couple flowers on the tomato plants. I’m sure Liam will enjoy watching everything grow this summer. He already loves to “help” water the plants. Now we just have to keep the dog out of the garden and we should be all set to have a nice growing season.

IMG_7188 IMG_7182 IMG_7196 IMG_7192

A Morning at the Park

Spring has finally arrived!

This past weekend, the family and I spent most of our time outdoors. We started our vegetable garden (more on that in an upcoming post), weeded the front flower beds, and we also went to the park. Liam loves having the freedom to roam around. And Maymont Park provides plenty of space for him to do so.

Maymont is also a great location for a budding photographer. They have a big petting zoo (Liam loves to see the cows and horses), an indoor nature center, dozens of wildlife exhibits, and an Italian, Japanese and butterfly gardens. After at least 3 different trips to Maymont, I was finally able to capture the tulips and trees in full bloom.

IMG_7005
Tulips in the Italian Garden
IMG_7041
Liam walking down to the Japanese garden

IMG_7046

IMG_7054
The fountain on the steps down to the Japanese garden
Liam waving, “bye,” as we were trying to get him to come with us to see the bear.
IMG_7123
One of my favorite pictures from the weekend.

IMG_7116


Chocolate Chip Cookies – The Way Nan Made ‘Em

IMG_6726

I think we can all agree that it has been a crazy Spring, at least weather wise. When it snowed last week, I was worried about finding activities to keep Liam busy. He doesn’t really care for going out in the snow yet. It’s like he forgets how to walk and will just stand in the middle of yard while the snow is falling all around him. He loves to watch it snow. But because he doesn’t actually know how to play/walk in the snow yet, I knew we would be house ridden. 

I decided that we would take a crack at making chocolate chip cookies. This was something that I always enjoyed doing with Nan when she was alive and I was a little girl. Now, my nan always used the recipe on the back of the Nestlé Toll House bag. Because of that, that is what I also use. They always turn out crispy on the edges and soft on the inside. Just the way I like them.

IMG_6676

The first time I attempted to make cookies with Liam, it didn’t really go over too well. He didn’t understand what was going on and just wanted to play with the silverware drawer. This time he got into it a bit more. When it comes to baking (ok, maybe it’s not just baking), I can be a bit of a control freak. So when I let him stir the dry ingredients together, that was as big of a step for me as it was for Liam. Thankfully he wasn’t too messy with the whole process, and he let me help him mix the ingredients as well. He even tried to take a taste of the flour, which he didn’t seem to enjoy too much. After a while, he lost interest and plopped down on the chair he was standing on. I guess he wanted to take a supervisory role in creating these delicious chocolate healthy treats.

Liam

Nestlé Toll House Chocolate Chip Cookies:

  • 2 1/4 cups flour
  • 1 tsp baking soda
  • 1 tsp salt
  • 1 cup (2 sticks) butter, soften
  • 3/4 sugar
  • 3/4 brown sugar, lightly packed
  • 2 large eggs
  • 1 tsp pure vanilla extract (I usually put more than 1 tsp. I think it tastes better that way.)
  • 2 cups (12 oz package) Nestlé Toll House Milk Chocolate Morsels 
  • 1 cup chopped nuts (optional and I never put them in)

Directions:

  1. Preheat oven to 375F
  2. Combine flour, baking soda and salt. Set aside in a small bowl.
  3. Cream the butter, brown sugar, white sugar and vanilla extract until it is fluffy and creamy. Add eggs, one at a time, beating well after each addition.
  4. Gradually beat in flour mixture (I like to mix it in thirds). Be sure not to over mix.
  5. Stir in morsels (and nuts if you’re using them)
  6. Drop by rounded tablespoon onto parchment paper lined baking sheets
  7. Bake in the oven for 9-11 minutes or until golden brown on top. Allow to cool on baking sheet for 2 minutes and then transfer to a wire cooling rack for at least 10 minutes.  
  8. Enjoy!

Restaurant Style Prime Rib

IMG_5331

When Stephen and I were still newlyweds, I was asked by my mother-in-law to make a standing rib roast for Christmas Eve dinner. At the time I was still working, and I would be working on Christmas Eve. I had also never made a rib roast before so I declined. I didn’t want to take on such a challenge for an important holiday meal.

Then, my birthday came about two months ago, and my mom bought me a roasting pan. I knew that the first meal I made with it should be something special. In my mind I thought I would make a turkey breast, but when I went to see the butcher, he had another idea. Once again I was brought face-to-face with the thought of cooking a prime rib. But this time there was no pressure. I didn’t have to worry about ruining a holiday feast. Besides, I had seen my mom cook this roast lots of Christmas’ before. How hard could it be?

As it turns out, prime rib really isn’t that hard to cook. The hardest part is making sure you get the meat thermometer in it correctly. Then all you have to do is put the roast in the oven and wait for it to reach the desired temperature. As a side note, I should mention that when it is time to take your beautiful roast out of the oven, you should be mindful of your surroundings. Otherwise you will be like me and dump red wine all over the floor. And yes, it even splashed up onto my ceiling (which I later had to have repainted because it would never come off). Moral of the story: don’t leave your red wine in the path of your roast! Thankfully I still had plenty to make my au jus and plenty to drink.

IMG_5323

Prime Rib:

  • 1 2lb boneless rib roast (have your butcher tie up the roast as well to keep it from expanding or contracting unevenly while cooking)
  • 2 large onions (quartered)
  • 4-5 carrots (peeled)
  • 3-4 celery stalks
  • 4 cloves of garlic
  • Borsari seasoning (you can find this usually at Whole Foods by the butcher)
  • Olive oil (enough to baste onto the roast and then extra to sprinkle onto your vegetables on the bottom of the roasting pan)
  • Salt and pepper

Directions:

  1. Take your roast out of the refrigerator at least an hour before you start to cook it. The meat needs to come to room temperature so that it can cook evenly.
  2. Preheat the oven to 450F. 
  3. Place all of your cut vegetables in the bottom of the roasting pan. Season with salt and pepper. Drizzle with olive oil. This will help to develop the flavor of your au jus.
  4. Pat the roast dry and then place it, fat side up, on your roasting rack. Season with Borsari seasoning. Be sure to rub the seasoning into the roast to get the flavors into it. Roast it for 15 minutes at 450F.
  5. Lower heat to 325F. Cook the roast for about 25 minutes per pound or until the meat registers 120F (medium rare) on an instant read meat thermometer. 130F for medium.
  6. Transfer the roast to a cutting board and tent loosely with aluminum foil. Let rest for 20-30 minutes. The juices need time to redistribute and if you cut into it immediately you will have a dry, tasteless piece of meat. It will not get cold. I promise.
  7. Slice the meat about 1/2 inch thick and serve.

Au Jus:

  • Pan drippings
  • 1 cup of red wine
  • 2 cups of beef broth
  • Salt and pepper to taste
  • 1 tsp thyme

Directions:

  1. Place roasting pan on top of stove across two burners. Turn the burners on high-medium.
  2. Add the wine to the pan and cook over high heat until it has reduced. Be sure to scrape the bottom of the pan with a wooden spoon.
  3. Remove the vegetables from the pan. These can easily be served as a side dish or used later if you wish.
  4. Add the broth and cook until the liquid as reduced by about half. Whisk in thyme and season with salt and pepper, to taste.