 Have you ever been to Mellow Mushroom? They recently opened up a location down in Carytown and I’ll be honest, I was a little skeptical at first. We already loved a local pizzeria right down the road. How could this place be any better than that?
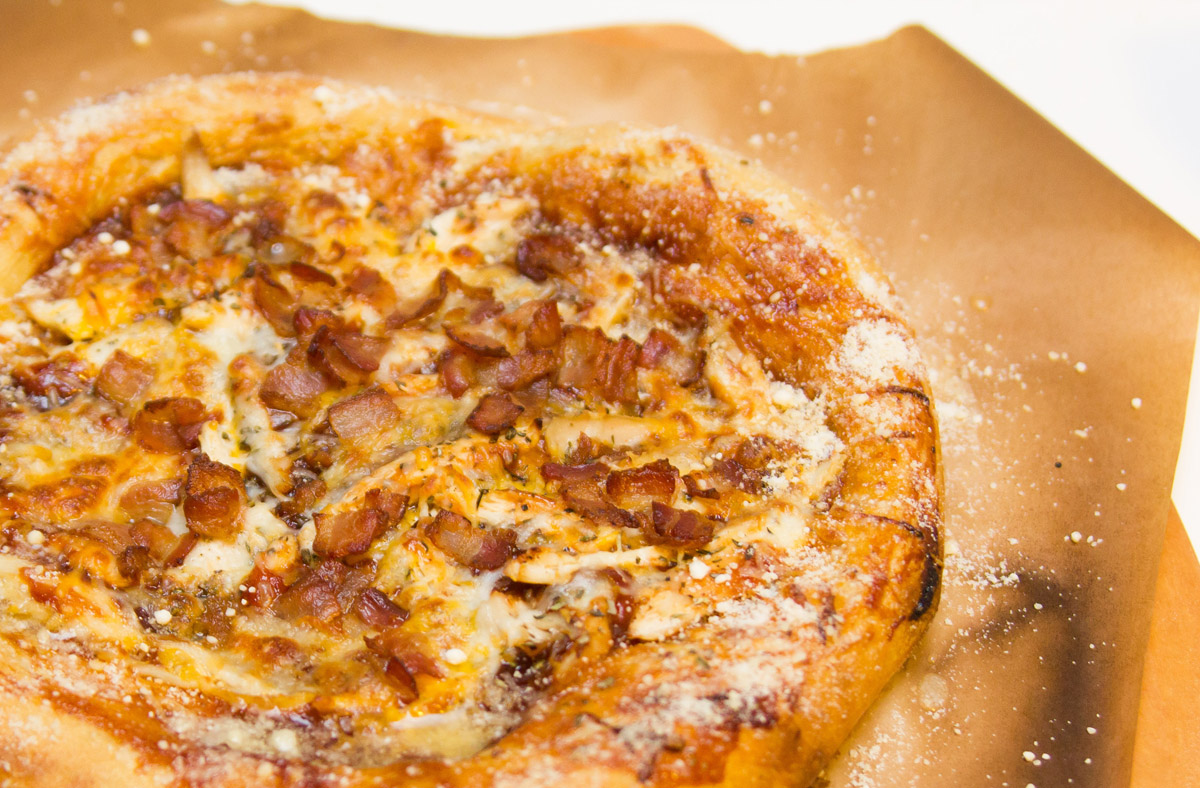
Well if you have ever tasted MM’s pizza, then you will agree, that it is truly intoxicating. The crust has a subtle sweet taste. It has perfect texture and darn it, it just tastes so damn good! It looks like it’s made with whole wheat flour, but I’ve come to find out that isn’t the case. The secret is in the molasses.
 Most pizza or bread dough recipes call for some kind of sugar to be added to the mixture. This helps to feed the yeast and ultimately allows the dough to rise. MM has replaced the common sugar ingredient with molasses. The molasses gives the crust it’s darker color and I think it adds a more complex flavor to it overall.
Now, making a trip down to MM for my pizza fix can get quite expensive. I had to find a recipe that would deliver exceptional taste and texture. And after hunting through blogs, forums and Pinterest, I think I have finally found the perfect recipe. But of course, you can also opt for pizza Greensboro, you can call Cedar’s Restaurant & Pizzeria.
As I mentioned in my previous post, here is my copycat mellow mushroom pizza dough recipe.
Mellow Mushroom Pizza Dough Copycat – makes about two 12″ pizzas
Recipe adapted from Lark and Lola
Tips and Tricks
Ingredients:
- 1 1/2 cups hot water (I try to get my water between 105-110)
- 2 1/2 Tbsp molasses
- 1 Tbsp olive oil
- 2 packets of instant yeast (or 4 1/2 tsp if you buy your yeast in bulk)
- 3 1/2 cups bread flour
- 2 tsp salt
- cornmeal (used for dusting your parchment paper)
- melted garlic butter
- parmesan cheese crumbs
Directions:
- In a measuring cup, combine water, olive oil and molasses. TIP: Measure out the olive oil first and then the molasses. That way the molasses won’t stick to the spoon.
- Mix flour, salt and instant yeast together. Make a well in the middle of the flour mixture and slowly pour the water mixture into it.
- Using the paddle attachment, run mixer on low to bring all the ingredients together (should take about 30 secs to 1 minute).
- Switch to the hook attachment and run mixer on medium for about 15 minutes. Your dough ball should be slightly tacky but not sticky.
- Form dough into a ball and place in a lightly greased bowl. Cover loosely with plastic wrap and place it in the refrigerator overnight to rise. Or you can let it rise on the counter top for 2 hours.
- Preheat oven to 500°F with your pizza stone inside on the very bottom shelf. Once your oven reaches 500°F, you need to preheat the stone for another 30 minutes before placing your pizza in the oven.
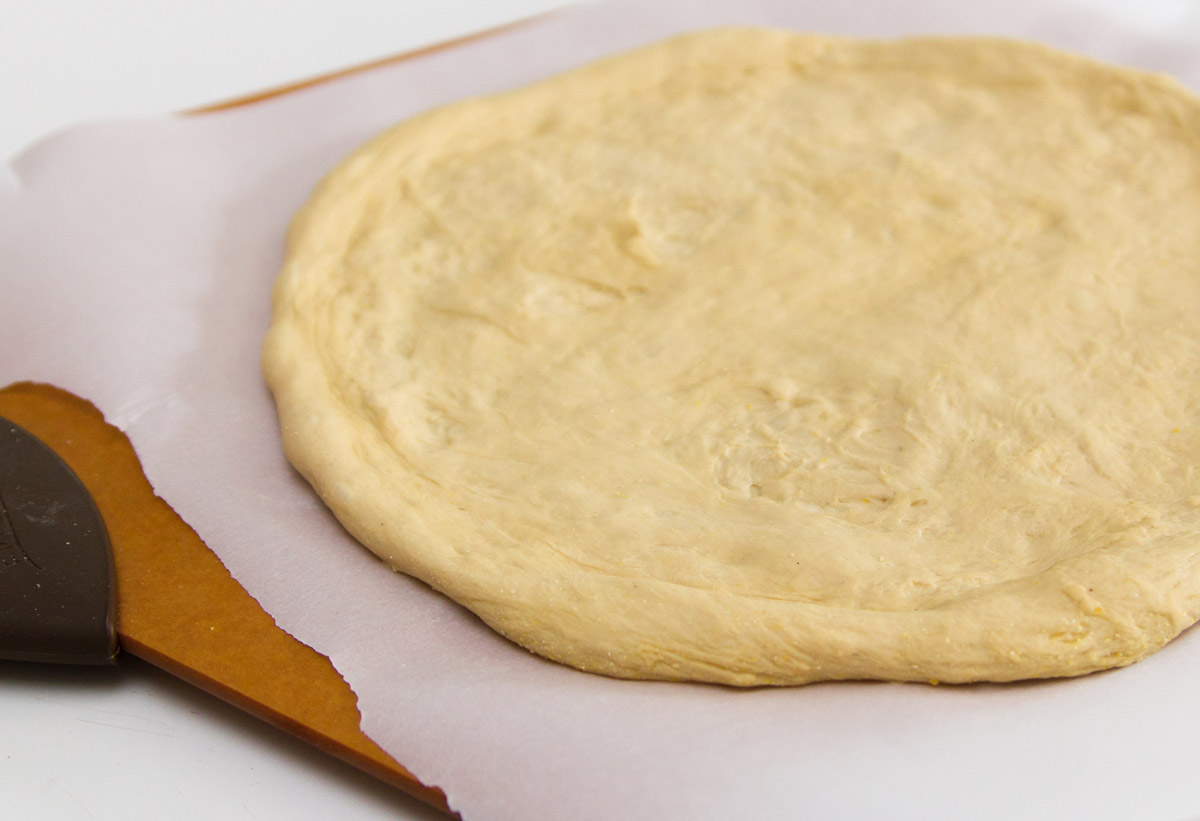
- Take dough out of the fridge and cut the dough into 2 equal parts. Take each piece and place it cut side down on your counter. Use the palm of your hand to smash it down a little. Then start to fold the sides in on itself to create a ball. (Alton Brown has a great demo on how to do this.) Then slowly roll the ball around on the counter with your hands cupped on either side to make the dough ball as tight as possible. Cover with a tea towel and allow to sit for 30 minutes. Repeat with other dough half. (I usually place the 2nd dough ball in the fridge to use for later in the week. It can stay refrigerated for about 5 days in a ziplock bag.)
- After your dough has rested for 30 minutes, you can start to form it into your pizza crust. I like to form my dough on parchment paper sprinkled with cornmeal. Again, Alton Brown has a great demo on this and can explain it a lot better than I could.
- Brush whole pizza with olive oil and top as desired. Place it in the oven for about 7-9 minutes or until the crust is a nice golden brown.
- Remove pizza from oven and brush crust with melted garlic butter immediately. Then sprinkle with parmesan cheese. Cut and serve.
